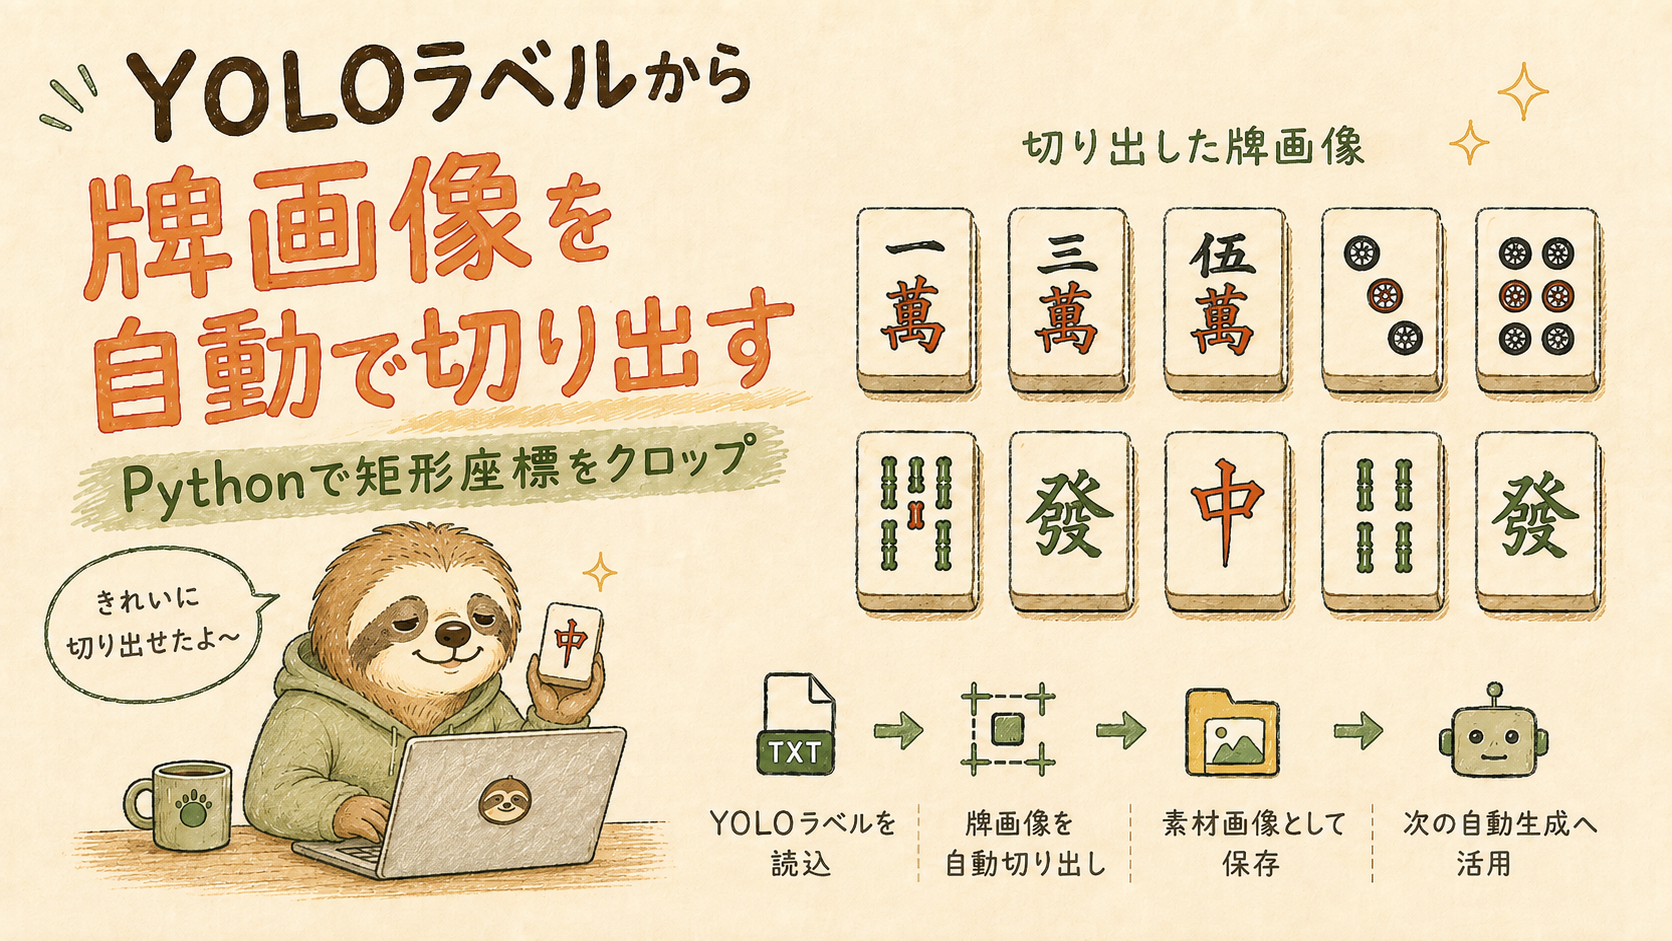
前回は、YOLOの矩形アノテーションをもとに、元画像から麻雀牌を1枚ずつ切り出しました。
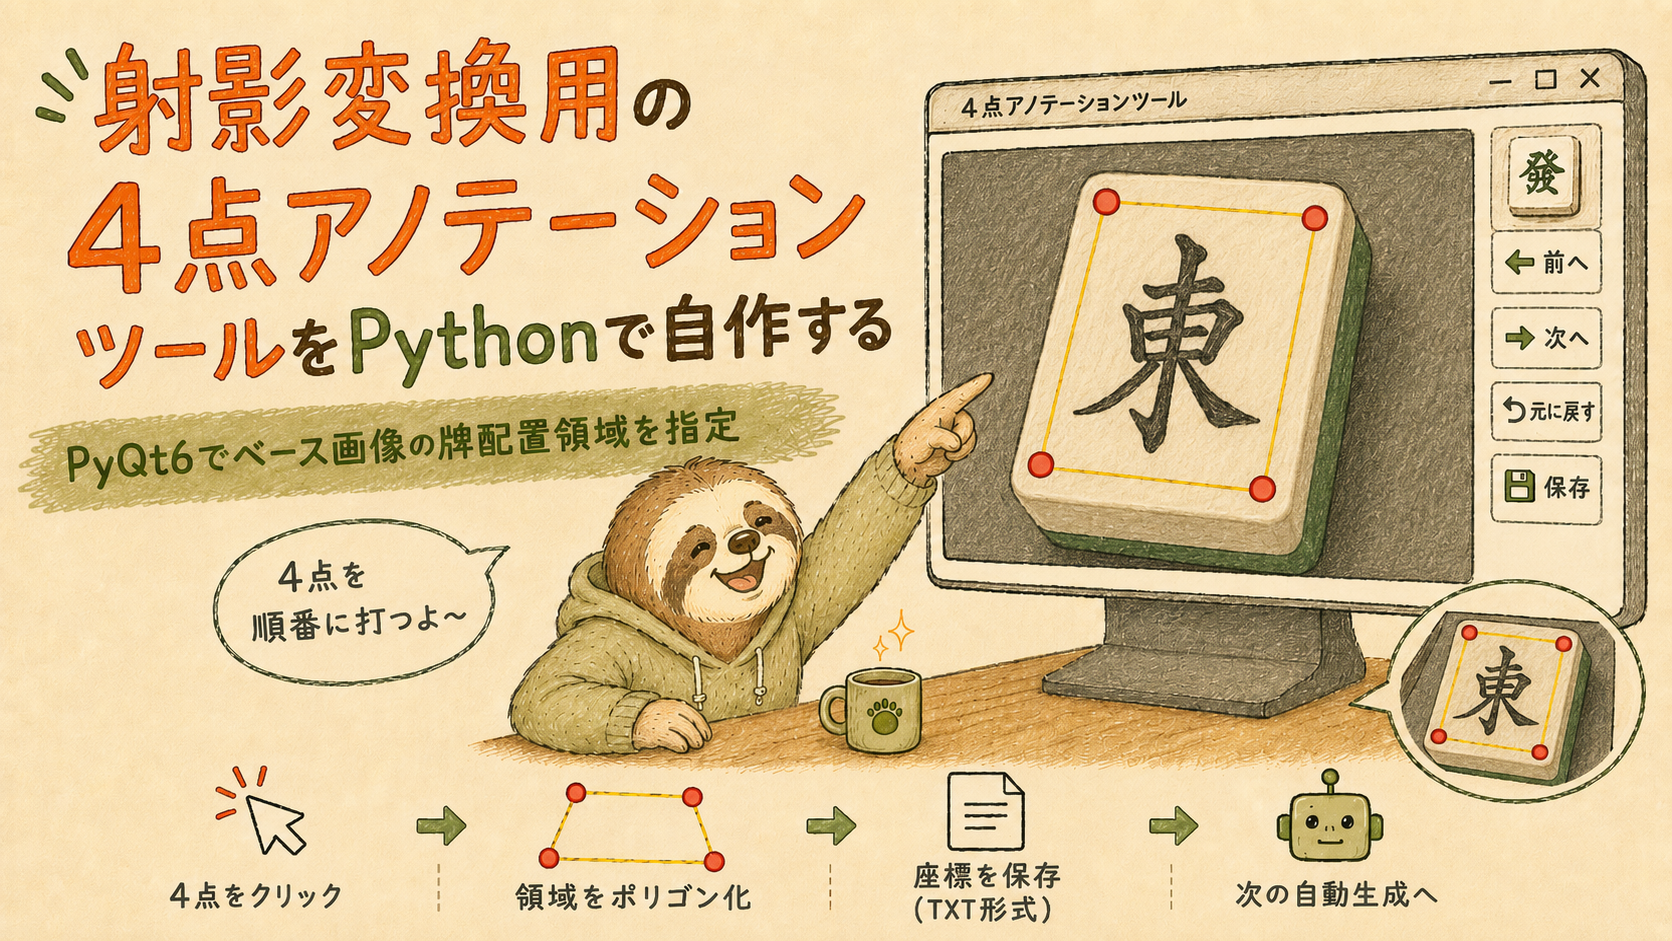
今回は、その切り出した牌画像を貼り付けるために、ベース画像側の牌配置領域を4点でアノテーションするツールを作ります。
通常であれば、
画像を撮影
↓
矩形アノテーション
↓
YOLOで学習
と、そのまま学習へ進むことが多いと思います。
しかし今回は、ここから少し違う方法で学習データを作っていきます。
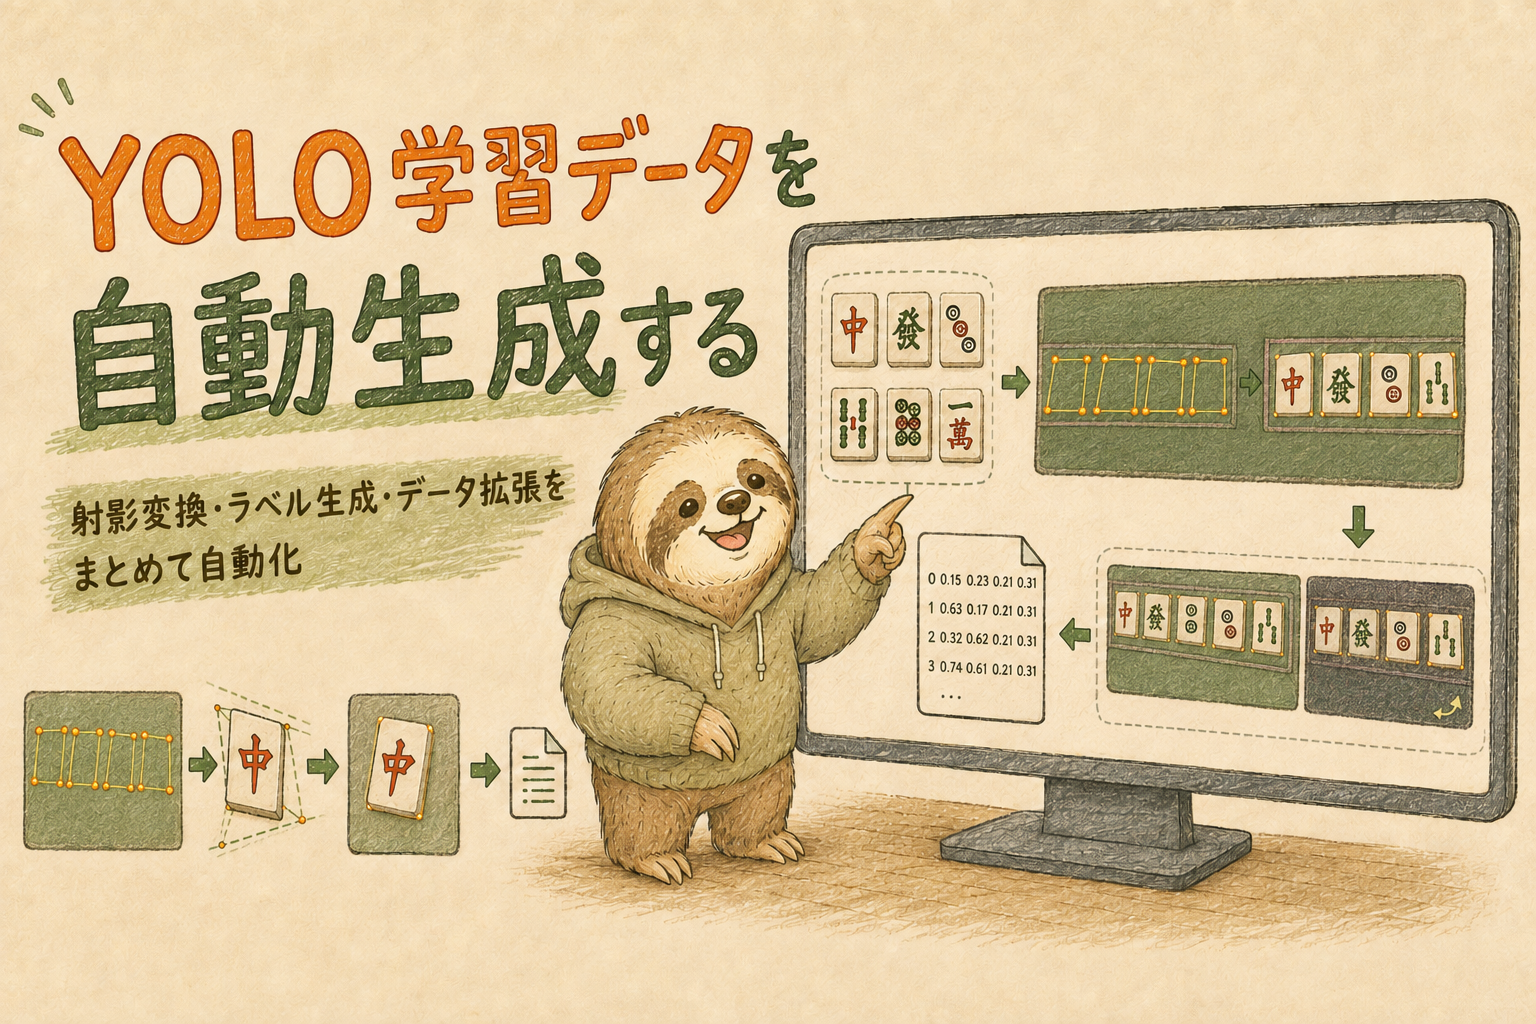
私が今回考えたデータ作成の流れでは、撮影画像をそのまま学習に使うだけではなく、切り出した牌画像を別のベース画像へ貼り付けて、新しい学習画像を大量に作るという方法を使います。
そのため、今回はベース画像に対して、
「どこに牌を置くのか」
を4点で指定する必要があります。
今回の流れは次のようになります。
撮影画像
↓
矩形アノテーション
↓
牌画像を切り出す
↓
ベース画像の牌配置領域を4点アノテーション
【今回】
↓
切り出した牌画像を射影変換して貼り付ける
↓
YOLOラベルを自動生成
↓
大量の学習画像を作る
↓
YOLOで学習
つまり今回の compositoin_annotation.py は、切り出した牌画像そのものを加工するツールではなく、牌画像を貼り付けるための「配置先」を作るツールです。
記事の後半には、今回使用している compositoin_annotation.py のコード全文も掲載しています。
なぜベース画像に4点アノテーションするのか
最初は、ベース画像上で牌を配置する領域も矩形で指定しようと考えていました。
矩形であれば処理も単純で、これまで作ってきたアノテーションツールと同じ考え方で実装できます。
しかし実際にベース画像を確認してみると、牌を置きたい場所によっては、
- 斜めに見えている
- 奥と手前で幅が違う
- 遠近感によって台形のようになっている
といった場所がありました。
そのため、単純な矩形では牌を配置したい領域にうまく収まらない場合がありました。
そこで今回は、矩形を自動的に作るのではなく、牌を配置したい領域の四隅を自分で4点選択する方法に変更しました。
①──────②
│            │
│  配置先    │
│            │
④──────③
実際には、ベース画像によって次のような形になることもあります。
   ①────②
    ╲         ╲
      ╲         ╲
        ④─────③
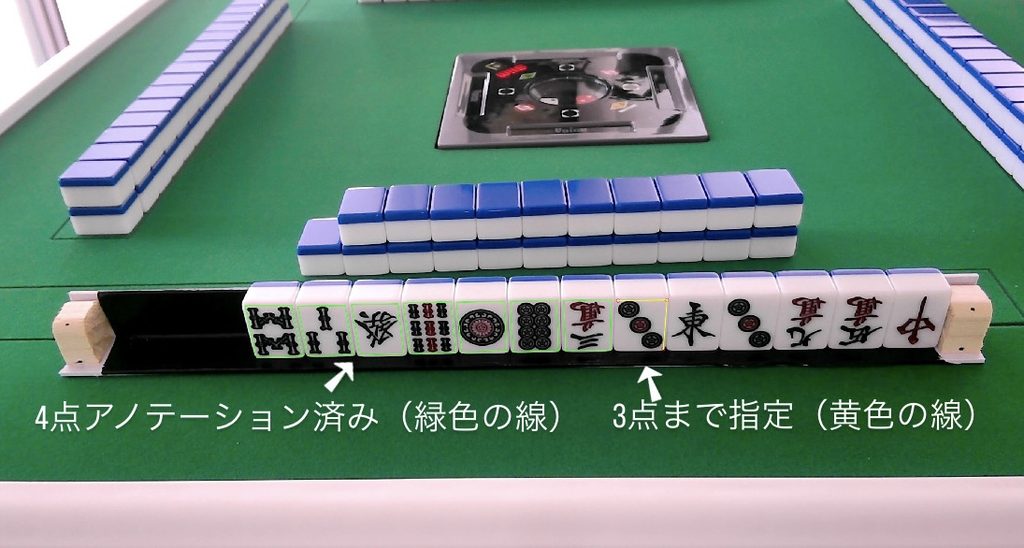
4点を自由に指定できるようにすることで、ベース画像上の牌の向きや遠近感に合わせて配置領域を設定できます。
この4点を次の工程で射影変換の変換先として使用し、切り出した牌画像をその形に合わせて変形して貼り付けます。
つまり今回4点アノテーションを採用した理由は、
「矩形ではベース画像上の牌配置位置にうまく合わせられなかったため」
です。
実際の画像を見ながら4点を指定することで、さまざまな角度や形の配置先に対応できるようにしました。
この4点が分かれば、次の工程で切り出した牌画像をこの形へ射影変換して、自然に貼り付けられます。
実際のアノテーション例 ↓
今回のプログラムでやること
今回のツールの役割はとてもシンプルです。
ベース画像を読み込む
↓
牌を置きたい領域を4点クリックで指定する
↓
4点を1つの領域として保存する
↓
次の画像へ進む
1枚のベース画像に対して、牌を配置したい位置を4点で指定していきます。
画像上を左クリックすると、点が追加されます。
2点目以降は、点同士を線でつなぎながら表示します。
4点目まで入力すると、その4点を1つの領域として確定します。
if len(self.current_points) == 4:
self.finalize_quad()この仕組みによって、ベース画像上の牌配置領域を順番に登録していけるようにしています。
4点の座標をTXTファイルへ保存する
今回のアノテーション結果は、YOLO形式ではなく、4点の座標をそのまま保存しています。
保存形式は次のようになります。
x1,y1,x2,y2,x3,y3,x4,y4コードでは、4点を順番に取り出して1行へまとめています。
for data in self.trapezoids:

    row = []

    for x, y in data["points"]:

        row.extend([
            int(round(x)),
            int(round(y))
        ])

    f.write(",".join(map(str, row)))
    f.write("\n")
例えば、次のような内容になります。
14,20,102,18,106,138,10,140保存先は画像と同じ名前の .txt ファイルです。
base_001.jpg
base_001.txt
このTXTファイルが、次の工程で牌画像を貼り付けるときの「配置先情報」になります。
保存済みのアノテーションも読み込める
作業を途中で止めたり、あとから修正したい場合もあります。
そのため、同じ名前の .txt ファイルがすでに存在する場合は、自動で読み込むようにしています。
if not os.path.exists(self.txt_path):
    return
読み込んだ座標は、4点のポリゴンとして再表示します。
polygon = QPolygonF(
    [QPointF(x, y) for x, y in points]
)
これにより、
一度アノテーション
↓
保存
↓
ツールを終了
↓
後日もう一度開く
↓
保存済みの配置領域を確認・修正
という使い方ができます。
Undo・ズーム・画像移動にも対応する
4点を指定する作業では、クリック位置を間違えることがあります。
そのため、Ctrl+Z / Command+Z で1つ前の操作へ戻せるようにしています。
まだ4点入力の途中であれば、最後の点を取り消します。
if len(self.current_points) > 0:

    self.current_points.pop()
すでに確定した領域がある場合は、最後に作成した領域を削除します。
if len(self.trapezoids) > 0:

    last = self.trapezoids.pop()

    self.removeItem(
        last["polygon"]
    )
また、細かい位置を確認しやすいように、マウスホイールでズームできるようにしています。
def wheelEvent(self, event):

    if event.angleDelta().y() > 0:

        self.scale(
            self.zoom_factor,
            self.zoom_factor
        )

    else:

        self.scale(
            1 / self.zoom_factor,
            1 / self.zoom_factor
        )
さらに、左右キーで前後の画像へ移動できます。
→:次の画像
←:前の画像
画像を切り替えるときには、自動で現在の内容を保存してから移動するようにしています。
def next_image(self):

    if self.current_index >= len(self.image_files) - 1:
        return

    self.scene.save_annotation()

    self.load_image(
        self.current_index + 1
    )
この4点を次の工程でどう使うのか
今回保存した4点は、次のデータセット自動生成で使用します。
次の工程では、
切り出した牌画像
+
ベース画像の4点座標
を組み合わせます。
処理のイメージは次のとおりです。
切り出した牌画像
↓
ベース画像上の4点の形へ射影変換
↓
ベース画像へ貼り付け
↓
貼り付け位置からYOLOラベルも自動生成つまり今回の4点アノテーションは、牌そのものの情報ではなく、「牌をどこに置くか」を決めるための情報です。
この工程があることで、1枚のベース画像から複数の学習画像を自動生成できるようになります。
完成したコード
今回使用したcompositoin_annotation.pyの全文です。
コードが長いため、デフォルトでは折りたたんでいます。必要に応じて「compositoin_annotation.py の全文を見る」をクリックしてください。
compositoin_annotation.py の全文を見る
import sys
import os
from pathlib import Path

from PyQt6.QtCore import Qt, QPointF
from PyQt6.QtGui import (
    QAction,
    QColor,
    QKeySequence,
    QPainter,
    QPen,
    QPixmap,
    QPolygonF,
)
from PyQt6.QtWidgets import (
    QApplication,
    QFileDialog,
    QGraphicsScene,
    QGraphicsView,
    QMainWindow,
)


# ============================================================
# Scene
# ============================================================

class AnnotationScene(QGraphicsScene):
    def __init__(self):
        super().__init__()
        self.image_item = None
        self.image_path = None
        self.txt_path = None
        self.current_points = []
        self.temp_point_items = []
        self.temp_line_items = []
        self.trapezoids = []


    def clear_annotation(self):
        self.clear()
        self.image_item = None
        self.current_points.clear()
        self.temp_point_items.clear()
        self.temp_line_items.clear()
        self.trapezoids.clear()


    def load_image(self, image_path):
        self.clear_annotation()
        self.image_path = image_path
        self.txt_path = str(Path(image_path).with_suffix(".txt"))
        pixmap = QPixmap(image_path)
        self.image_item = self.addPixmap(pixmap)
        self.setSceneRect(self.itemsBoundingRect())
        self.load_annotation()


    def load_annotation(self):
        if not self.txt_path:
            return
        if not os.path.exists(self.txt_path):
            return

        with open(self.txt_path, "r") as f:
            for line in f:
                line = line.strip()
                if not line:
                    continue

                vals = list(map(float, line.split(",")))
                if len(vals) != 8:
                    continue

                points = []
                for i in range(0, 8, 2):
                    points.append((vals[i], vals[i + 1]))

                polygon = QPolygonF(
                    [QPointF(x, y) for x, y in points]
                )

                poly_item = self.addPolygon(
                    polygon,
                    QPen(QColor(0, 255, 0), 2)
                )

                self.trapezoids.append({
                    "points": points,
                    "polygon": poly_item
                })


    def save_annotation(self):
        if not self.txt_path:
            return

        with open(self.txt_path, "w") as f:
            for data in self.trapezoids:
                row = []
                for x, y in data["points"]:
                    row.extend([
                        int(round(x)),
                        int(round(y))
                    ])
                f.write(",".join(map(str, row)))
                f.write("\n")
        print("saved:", self.txt_path)


    def add_temp_point(self, x, y):
        item = self.addEllipse(x - 4, y - 4, 8, 8, QPen(QColor(255, 0, 0)),)
        self.temp_point_items.append(item)


    def add_temp_line(self):
        if len(self.current_points) < 2:
            return
        x1, y1 = self.current_points[-2]
        x2, y2 = self.current_points[-1]
        line = self.addLine(
            x1,
            y1,
            x2,
            y2,
            QPen(QColor(255, 255, 0), 2)
        )
        self.temp_line_items.append(line)


    def finalize_quad(self):
        polygon = QPolygonF(
            [
                QPointF(x, y)
                for x, y in self.current_points
            ]
        )
        poly_item = self.addPolygon(
            polygon,
            QPen(QColor(0, 255, 0), 2)
        )
        self.trapezoids.append({
            "points": self.current_points.copy(),
            "polygon": poly_item
        })
        for item in self.temp_point_items:
            self.removeItem(item)

        for item in self.temp_line_items:
            self.removeItem(item)

        self.current_points.clear()
        self.temp_point_items.clear()
        self.temp_line_items.clear()


    def undo(self):
        if len(self.current_points) > 0:
            self.current_points.pop()
            if len(self.temp_point_items) > 0:
                item = self.temp_point_items.pop()
                self.removeItem(item)

            if len(self.temp_line_items) > 0:
                item = self.temp_line_items.pop()
                self.removeItem(item)
            return

        if len(self.trapezoids) > 0:
            last = self.trapezoids.pop()
            self.removeItem(last["polygon"])


    def delete_last(self):
        if len(self.trapezoids) == 0:
            return
        last = self.trapezoids.pop()
        self.removeItem(last["polygon"])


    def mousePressEvent(self, event):
        if event.button() != Qt.MouseButton.LeftButton:
            return super().mousePressEvent(event)

        pos = event.scenePos()
        x = pos.x()
        y = pos.y()
        self.current_points.append((x, y))
        self.add_temp_point(x, y)
        self.add_temp_line()
        if len(self.current_points) == 4:
            self.finalize_quad()

        super().mousePressEvent(event)


class AnnotationView(QGraphicsView):
    def __init__(self, scene):
        super().__init__(scene)
        self.zoom_factor = 1.15
        self.setRenderHint(
            QPainter.RenderHint.Antialiasing
        )
        self.setDragMode(
            QGraphicsView.DragMode.ScrollHandDrag
        )
        self.setTransformationAnchor(
            QGraphicsView.ViewportAnchor.AnchorUnderMouse
        )


    def wheelEvent(self, event):
        if event.angleDelta().y() > 0:
            self.scale(self.zoom_factor, self.zoom_factor)
        else:
            self.scale(1 / self.zoom_factor, 1 / self.zoom_factor)


class MainWindow(QMainWindow):
    def __init__(self):
        super().__init__()
        folder = QFileDialog.getExistingDirectory(
            self,
            "jpgフォルダ選択",
        )
        if not folder:
            sys.exit()
        self.image_files = sorted(
            [
                str(p)
                for p in Path(folder).glob("*.jpg")
            ]
        )
        if len(self.image_files) == 0:
            print("jpg not found")
            sys.exit()

        self.current_index = 0
        self.scene = AnnotationScene()
        self.view = AnnotationView(self.scene)
        self.setCentralWidget(self.view)
        self.resize(1600, 1000)
        self.load_image(0)
        self.create_actions()


    def create_actions(self):
        save_action = QAction(self)
        save_action.setShortcut(
            QKeySequence("Ctrl+S")
        )
        save_action.triggered.connect(
            self.scene.save_annotation
        )
        self.addAction(save_action)

        save_action_mac = QAction(self)
        save_action_mac.setShortcut(
            QKeySequence("Meta+S")
        )
        save_action_mac.triggered.connect(
            self.scene.save_annotation
        )
        self.addAction(save_action_mac)

        undo_action = QAction(self)
        undo_action.setShortcut(
            QKeySequence("Ctrl+Z")
        )
        undo_action.triggered.connect(
            self.scene.undo
        )
        self.addAction(undo_action)

        undo_action_mac = QAction(self)
        undo_action_mac.setShortcut(
            QKeySequence("Meta+Z")
        )
        undo_action_mac.triggered.connect(
            self.scene.undo
        )
        self.addAction(undo_action_mac)

        # 次画像
        next_action = QAction(self)
        next_action.setShortcut("N")
        next_action.triggered.connect(
            self.next_image
        )
        self.addAction(next_action)

        # 前画像
        prev_action = QAction(self)
        prev_action.setShortcut("P")
        prev_action.triggered.connect(
            self.prev_image
        )
        self.addAction(prev_action)

        next_action.setShortcut("Right")
        prev_action.setShortcut("Left")


    def load_image(self, index):
        self.current_index = index
        image_path = self.image_files[index]
        self.scene.load_image(image_path)
        self.setWindowTitle(
            f"[{index+1}/{len(self.image_files)}] "
            f"{os.path.basename(image_path)}"
        )


    def next_image(self):
        if self.current_index >= len(self.image_files) - 1:
            return
        self.scene.save_annotation()
        self.load_image(self.current_index + 1)


    def prev_image(self):
        if self.current_index <= 0:
            return
        self.scene.save_annotation()
        self.load_image(self.current_index - 1)


    def closeEvent(self, event):
        self.scene.save_annotation()
        event.accept()


def main():
    app = QApplication(sys.argv)
    window = MainWindow()
    window.show()
    sys.exit(app.exec())


if __name__ == "__main__":
    main()
実行方法
最後に、今回作成した4点アノテーションツールの実行方法を紹介します。
必要なライブラリ
今回のGUIにはPyQt6を使用しています。
PyQt6が入っていない場合はインストールします。
pip install PyQt6ベース画像を用意する
今回は、牌画像を貼り付けるためのベース画像を用意します。
例えば、次のような構成です。
base_images/
├── base_001.jpg
├── base_002.jpg
├── base_003.jpg
└── ...
このベース画像に対して、牌を配置したい位置を4点でアノテーションしていきます。
プログラムを実行する
ターミナルから compositoin_annotation.py を実行します。
python compositoin_annotation.py環境によっては、次のように実行します。
python3 compositoin_annotation.py起動すると、最初に画像フォルダを選択する画面が表示されます。
ここで、ベース画像が入っているフォルダを選択します。
4点をアノテーションする
画像が表示されたら、牌を配置したい領域の四隅を順番にクリックします。
4点目をクリックすると、領域が確定します。
主な操作は次のとおりです。
| 操作 | 内容 |
|---|---|
| 左クリック | 4点を順番に指定 |
| マウスホイール | 画像を拡大・縮小 |
| Ctrl+Z / Command+Z | 1つ前の操作へ戻す |
| Ctrl+S / Command+S | 現在のアノテーションを保存 |
| → | 保存して次の画像へ |
| ← | 保存して前の画像へ |
保存されたTXTファイルは、元画像と同じフォルダへ作成されます。
base_001.jpg
base_001.txt
これで、次の射影変換で使用する配置領域の4点座標が準備できます。
まとめ
今回は、切り出した牌画像を貼り付けるために、ベース画像上の牌配置領域を4点でアノテーションするツールを作りました。
今回のツールで保存しているのは、牌画像の情報ではなく、
「ベース画像のどこに牌を置くか」
という情報です。
この4点があることで、次の工程では
切り出した牌画像
↓
ベース画像上の4点に合わせて射影変換
↓
貼り付け
↓
YOLOラベルも自動生成
という流れで、学習データを自動生成できるようになります。
ここまでで、
撮影
↓
矩形アノテーション
↓
牌画像を切り出す
↓
ベース画像の配置領域を4点アノテーション
まで準備できました。
次回は、ここまで作ってきた牌画像と4点座標を使って、麻雀牌のYOLO学習データを自動生成する処理を作ります。
関連記事
- 麻雀CPU、あったらいいので作ります。④ 実物の牌を認識できるのか試してみた
- YOLOモデルの作り方をゼロから解説|通常の学習手順と自動生成までの全体像
- OpenCVでYOLOの学習用画像を撮影するツールを作る
- YOLO用矩形アノテーションツールをPythonで自作する
- YOLOラベルから牌画像を自動で切り出す
- 麻雀牌のYOLO学習データを自動生成する
- Ultralytics YOLOを学習する
コメント